Quickstart
The quickstart guide takes you through a frontend install with at least one backend.
It only uses the stackios minimal ISO. For more options, read the Frontend Installation documentation.
Follow this guide if you are:
- Kicking the tires.
- Starting a new cluster.
- Have never done this before.
Do not follow this guide if:
- You’ve done it many many times before. It’s all just the same.
- You want Ubuntu. It is not currently supported on Stacki 5.x.
- You want CentOS/RHEL 6.x - not supported yet. (Really? 7.x beckons.)
(If you really, really, really…really, need 2 or 3, use Stacki-4.0.
Default cluster install
Four steps:
- Check Requirements
- Download the software
- Install the frontend.
- Install backend(s).
That’s it.
Don’t do any of this if you haven’t checked your machine/VM against the requirements.
If you ask for help, it’s the first thing we’re going to ask you, and you will sense the silent acid rain of mockery in our Slack responses.
1. Check Requirements
Frontend:
- At least 2G of memory (4GB recommended), especially for a VM.
- A least 100G of system disk.
- At least one network where backend machines can talk to frontend machines.
- The software.
Backend:
- At least 3G of memory (4GB recommended).
- At least 80G system disk.
- At least one network that talks to the frontend.
- PXE first!
2. Download the software
The current version of StackiOS is Stacki 5.4.1.
stackios-5.4.1-redhat7.x86_64.disk1.iso (MD5: 03daf2291e8d6617f8ae1f4d5e821ed6)
Check the md5sum. Yeah, no, check the md5sum. Remember, silent acid rain of mockery.
3. Install the frontend
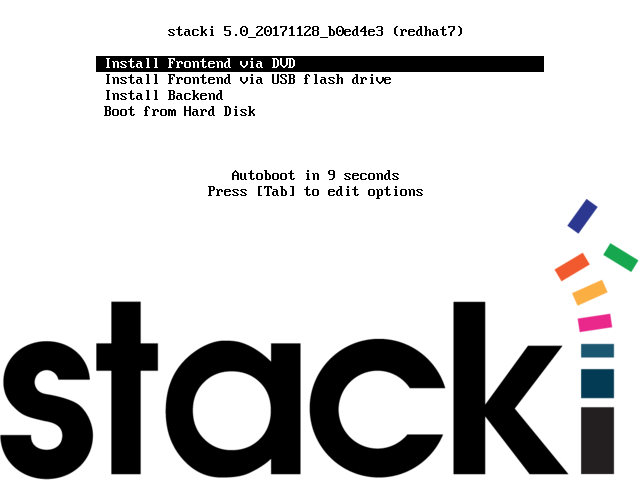
Burn the ISO to a DVD or USB. Then put the just burned DVD into an external, internal, or virtual DVD drive.
I proceed with pictures from a VirtualBox install. The actions are the same on bare metal or other virtual environments. If you can’t extrapolate from one platform to the next, are you certain you have chosen the correct career?
This is just an average CentOS/RHEL install. Nothing new here.
Put the DVD in and boot it. Pick the first option if you have a DVD. The second if you’re using a USB
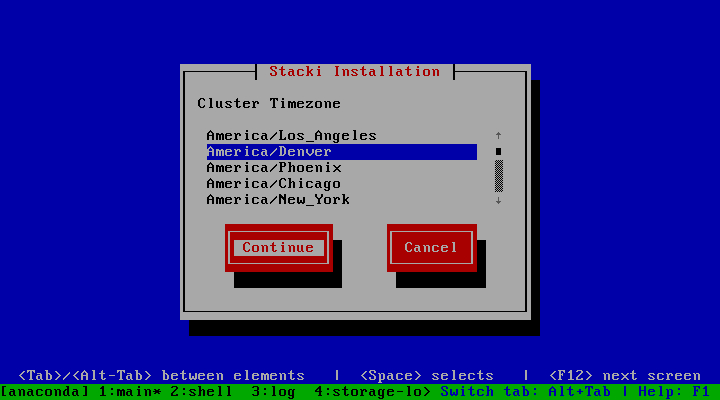
It will bring you to choose your Timezone. So do that and hit Continue.
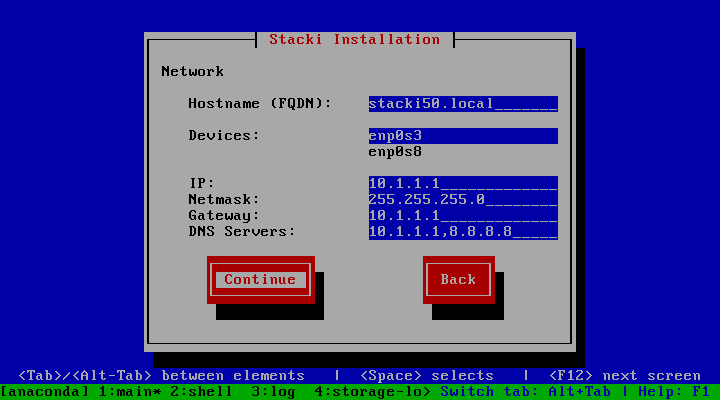
The next screen is network set-up. Input the information for the network that the frontend and backend share. After installation, you can add more networks and interfaces.
Do not get this network wrong! Changing it after the fact means a RE-INSTALL of the frontend.
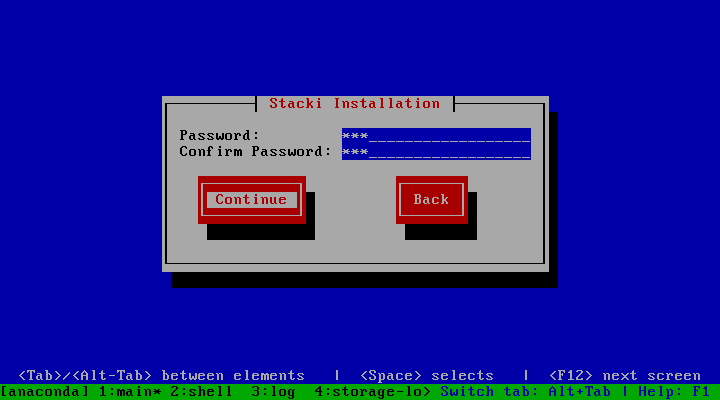
Choose a password, but better than the one in this png. Seriously, your career will thank me later.
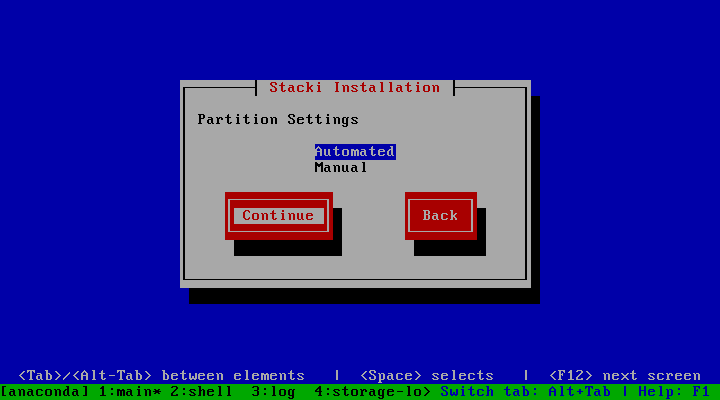
Partitioning is next. If you’ve never done this, choose “Automated.” If you have site requirements, choose “Manual” and go through the CentOS/RHEL 7.x partitioning screens.
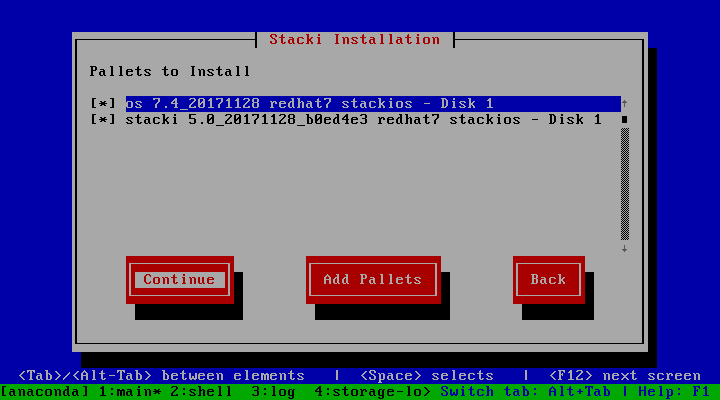
Pallets to Install. Make sure there’s a ‘*’ next to each of those. Don’t deselect either of them, you won’t get an installed frontend.
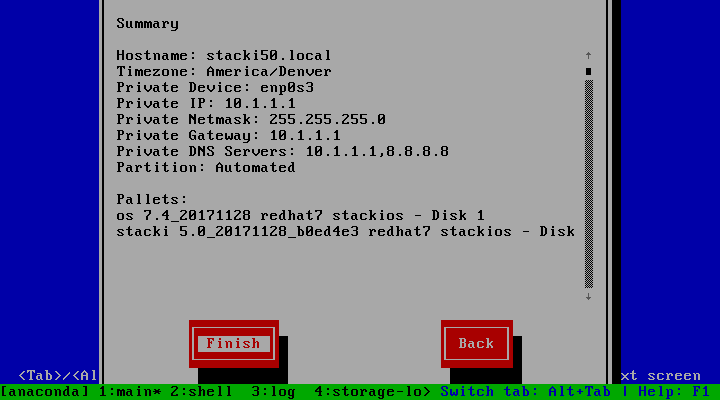
Summary. Make sure it’s good. If it’s not, go back and fix it. Then “Finish” and the machine will start the installation of the frontend.
You’ll see install screens. This is typical of a CentOS server install. Don’t click on any buttons. It’s doing its job. Your job is to have another cuppa and don’t interfere.
More screens go by. Packages install. Post-install scripts get run. This is a Quickstart so 15 more pngs are not going to be “quick.”
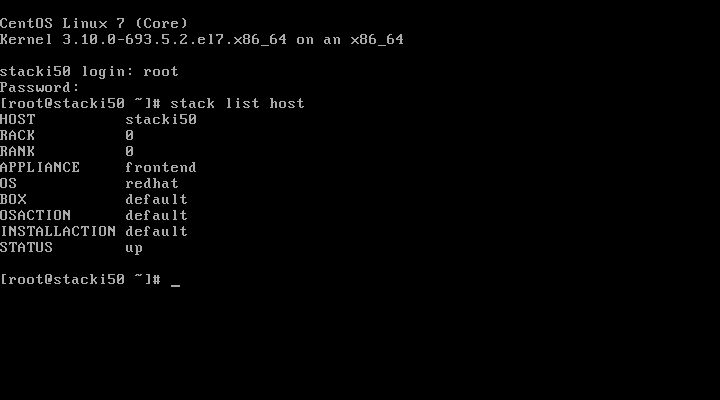
You should end up here:
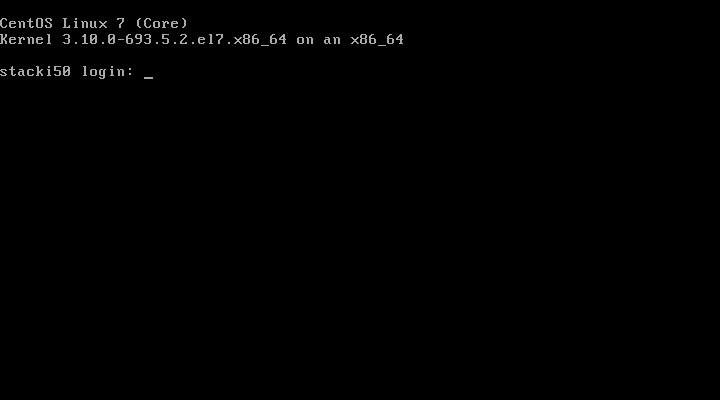
Log-in and run the following to verify it worked:
# stack list host
# stack list pallet
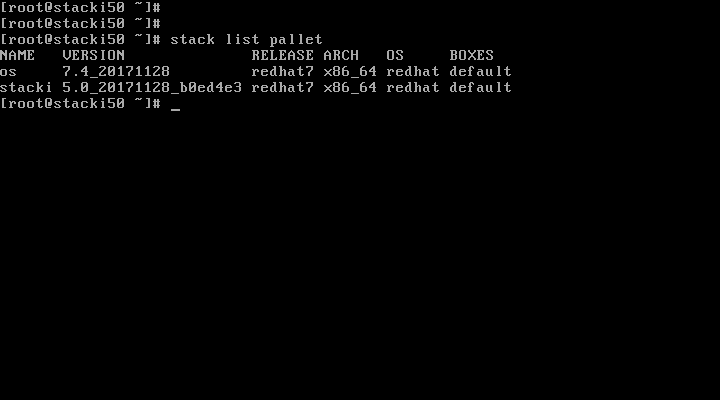
Looks good! Let’s go!
4. Install backend(s)
** Please note: Installing laptops as backends is not supported. Ever. Evvvvvvvverrrrrrrrrr. Don’t write, don’t call, don’t text if you’re trying to install a laptop as a backend server. Our most acidic mockery is reserved for you. (pH level = 0 = battery acid) If you’re successful, great, don’t tell us, we don’t care. **
You have a frontend. It’s useless if it’s not managing backend nodes.
You can add backend hosts either with a spreadsheet or discovery.
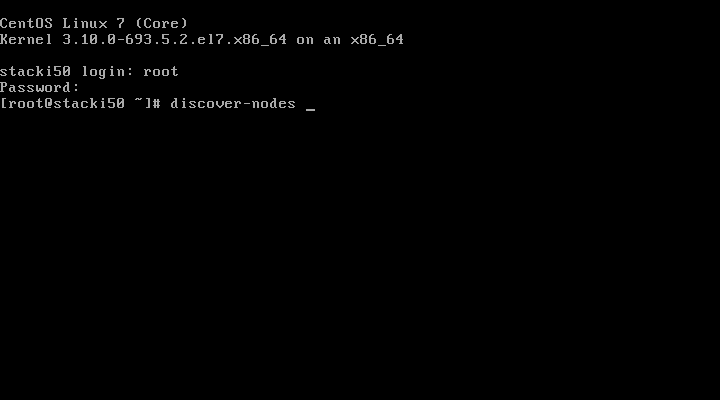
Since this is “quick” start. We’ll use discovery.
You must be allowed to run promiscuous DHCP for the initial install. After the initial install, you don’t need to run discovery again and reinstalls will be hostname/mac/ip matched.
Log into the frontend and start “discover-nodes.” This sets the frontend to listen for all DHCP requests. It will attempt to answer any request made to it.
The default appliance you have is the “Backend” appliance. Choose that because you don’t know enough yet to create your own.
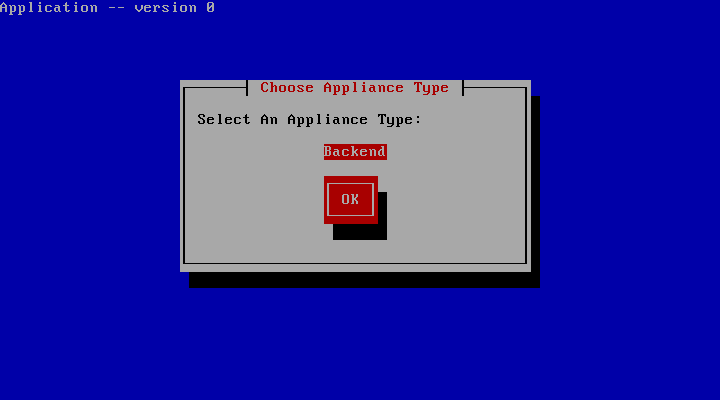
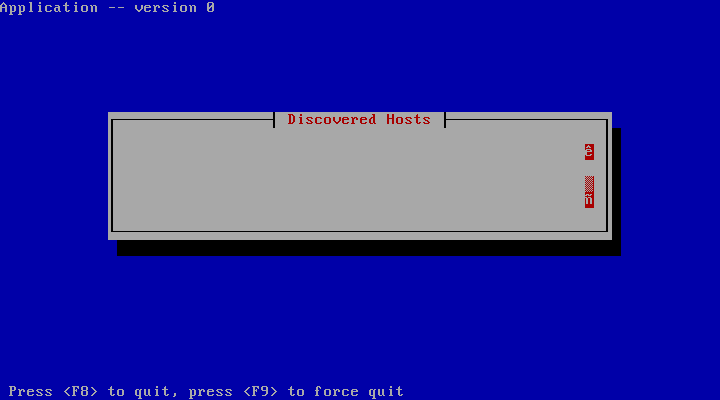
You now have a blank screen waiting to receive DHCP requests.
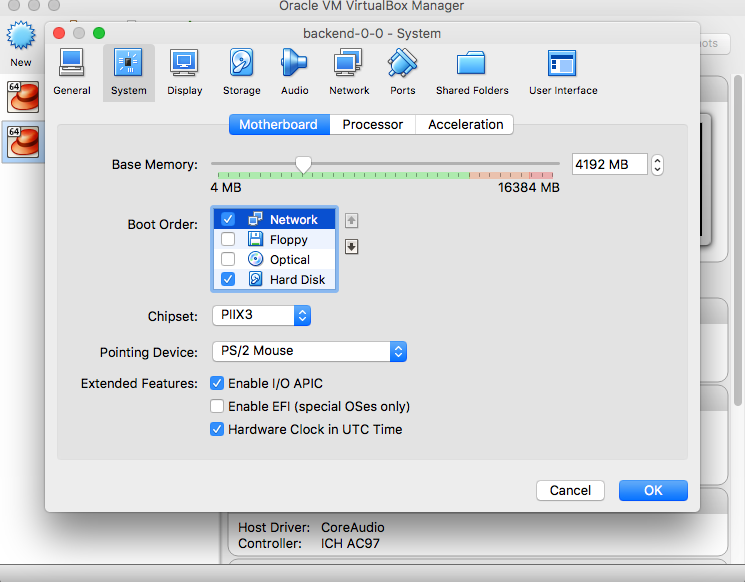
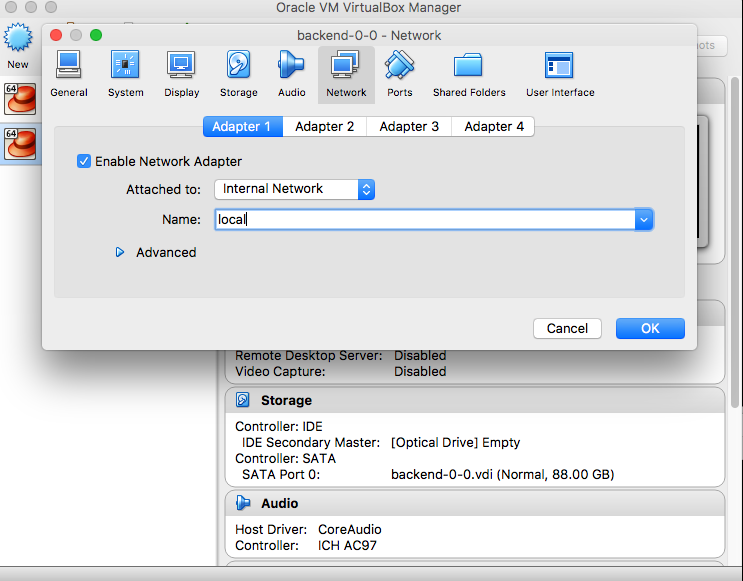
Set-up the backend(s)
These two pictures show the minimal requirement for a backend node. It’s just an example.
Backend nodes have to have PXE set first in the BIOS boot order. A must. An absolute requirement. A categorical imperative (Yeaaah, you know your Kant). You’re not installing anything automated or at scale if you’re not doing this. Don’t argue. I have 15 years of arguments waiting to be used.
If the vendor does not set PXE first on your machines, you have to go do it.
- Boot the machine.
- Select BIOS Setup.
- Enable PXE on the NIC wired to the installation network.
- In the boot order set that NIC to the first boot device.
- Save settings and exit.
On a VM it looks like this:
The frontend and backend have to be on the same network to talk to each other. It doesn’t have to be the same network as your apps or storage or whatever. But the wires where the backends make requests and the frontend gives answers has to be the same set of wires.
In this VM example, we’re putting both networks on a “local” network. They can only talk to each other. It looks like this:
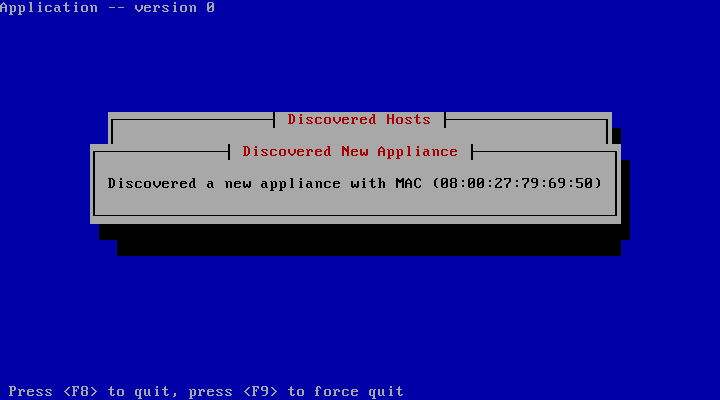
Now power on the backend machine.
Breathe.
Back on the frontend you should see the backend node gets discovered:
The node, patiently waiting for its configuration file:

The node with its configuration file and the kickstart started. Note the ‘*’ that tells you this:

You can quit out of the discover-nodes application at this point. Or discover more machines. It stops when you stop booting backends.
If you want to see the status of the node as it installs you can do:
# watch -n 2 "stack list host status"
The “STATE” column will periodically indicate what is happening.
When the state says “online”, it’s installed, and you should be able to ssh to it without giving a password.
# ssh backend-0-0
or run the cluster command:
# stack run host command="uptime"
Woohoo! Let’s go Customize!
Edited by: Bill Sanders on Mon Oct 26 12:41:04 2020 -0700
Commit: 9d1f858